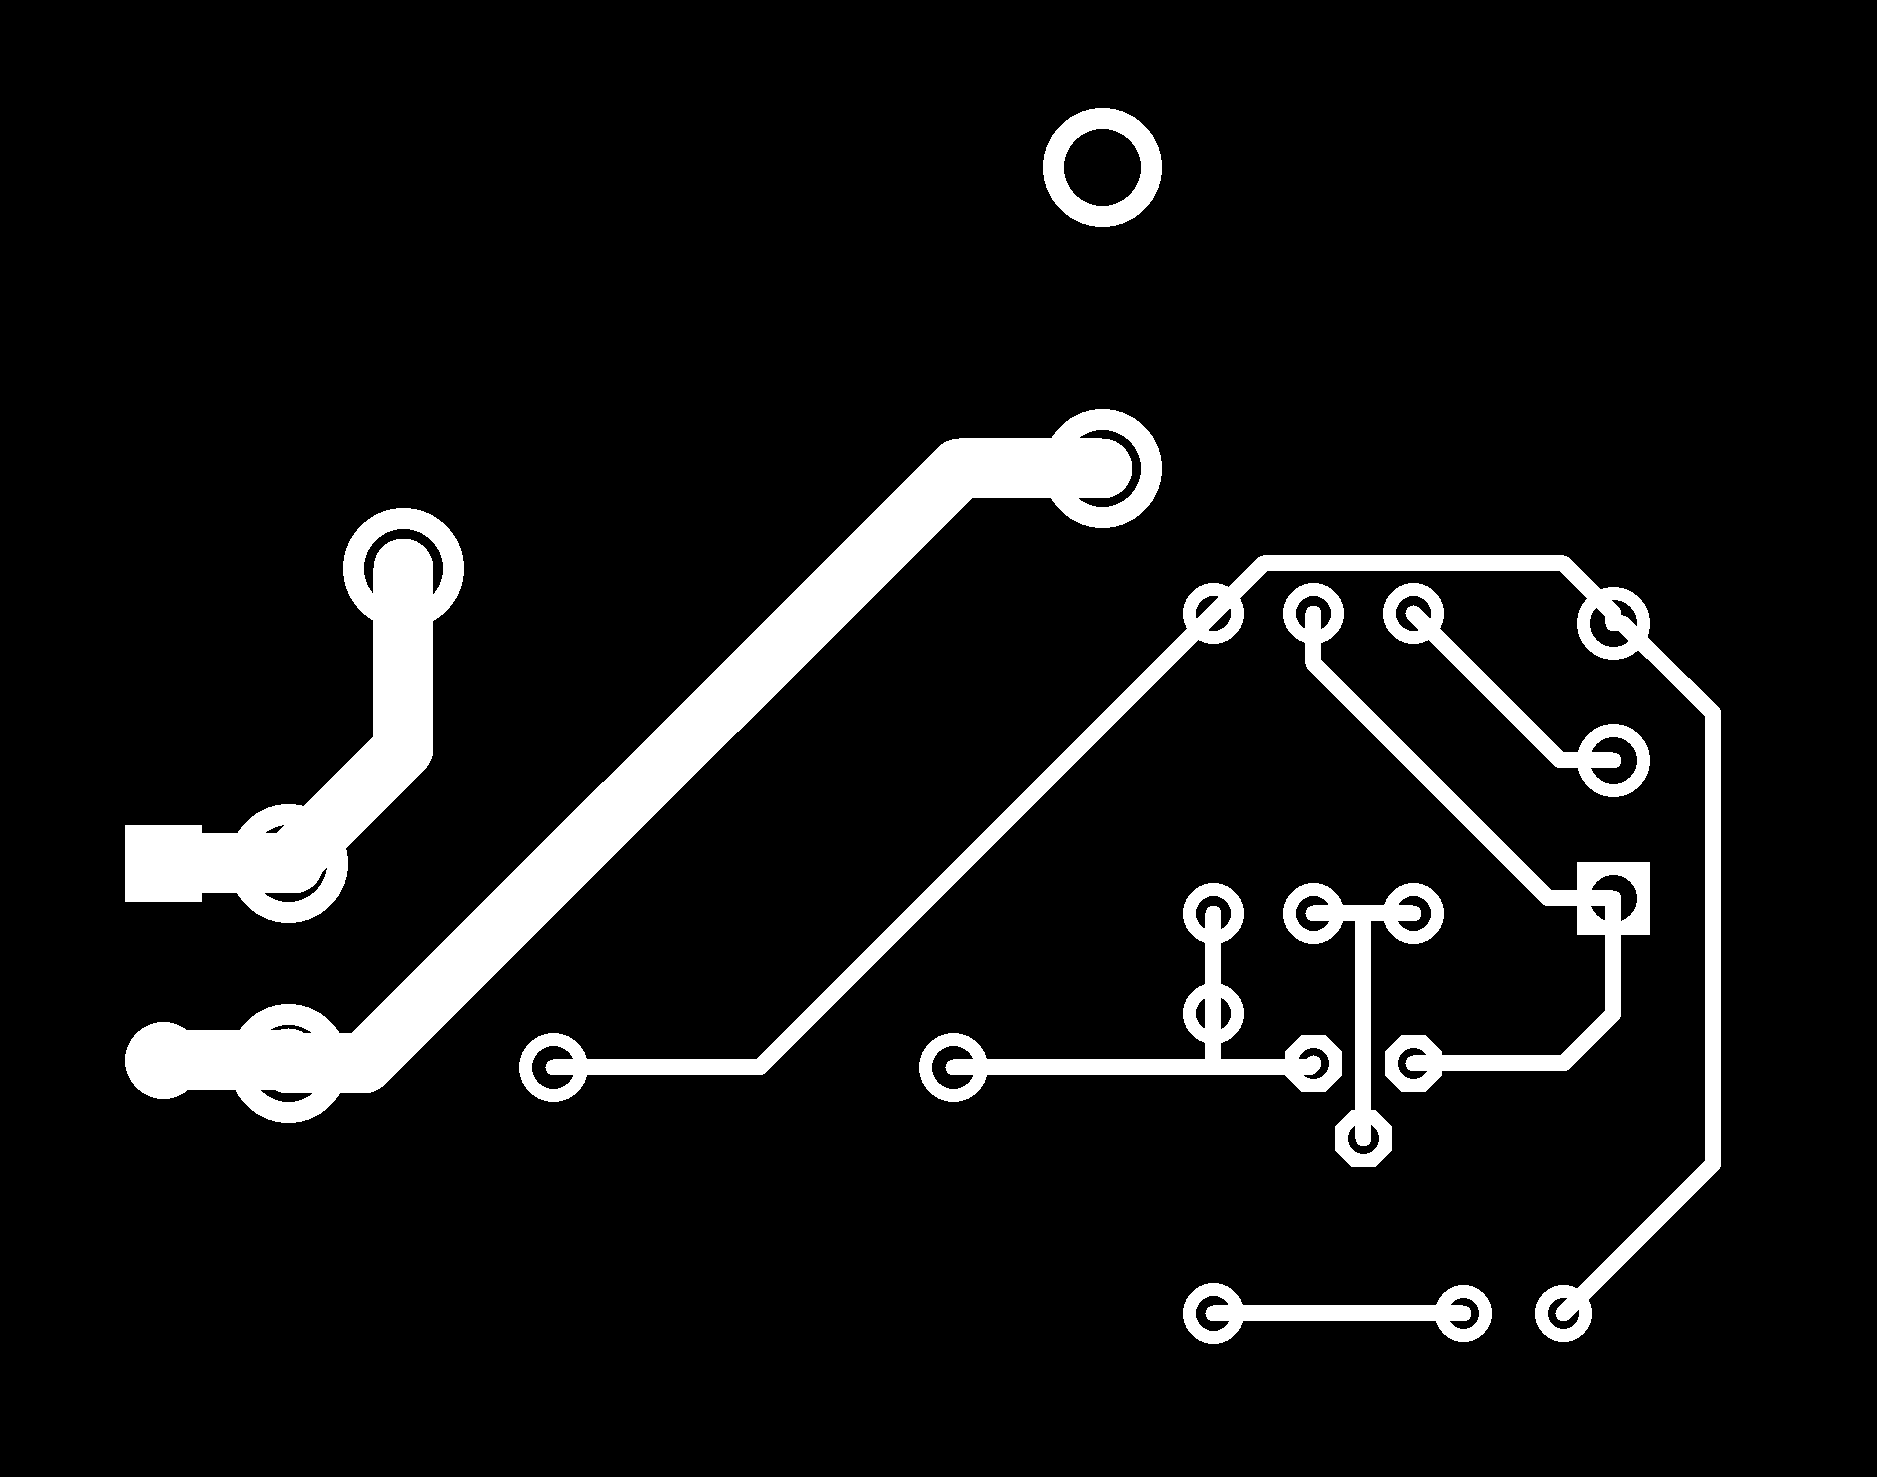
Black and White file of board
1Prepare your files, these just need to follow a few specific rules
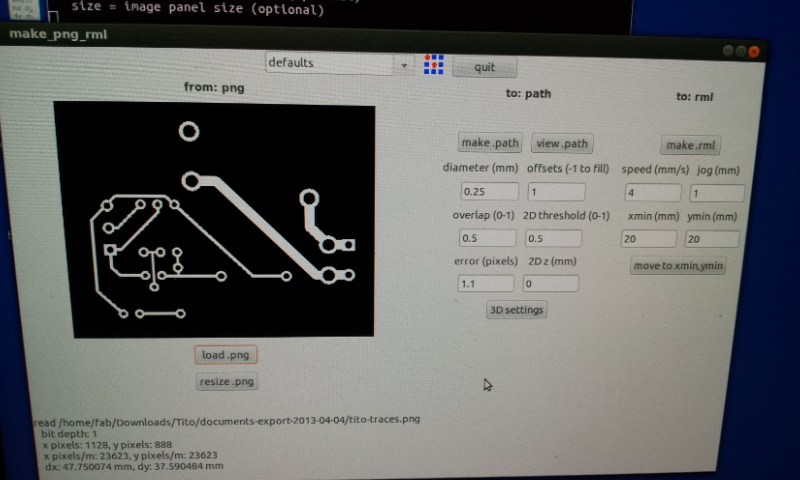
a. a png image
b. somewere between 500-1000
c. The traces should be white and the background should be black
These files can be prepared with Eagle software but I'm also guessing that you
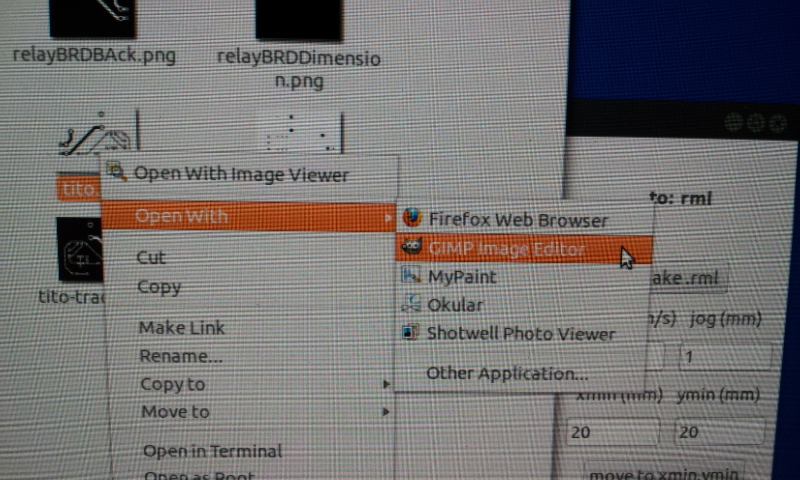
GIMP
could create a file on any drawing program as long as you keep to the minimum
characteristics.
You can use gimp on the computer of the modela to prepare your files.
|

Type "fab" on the terminal
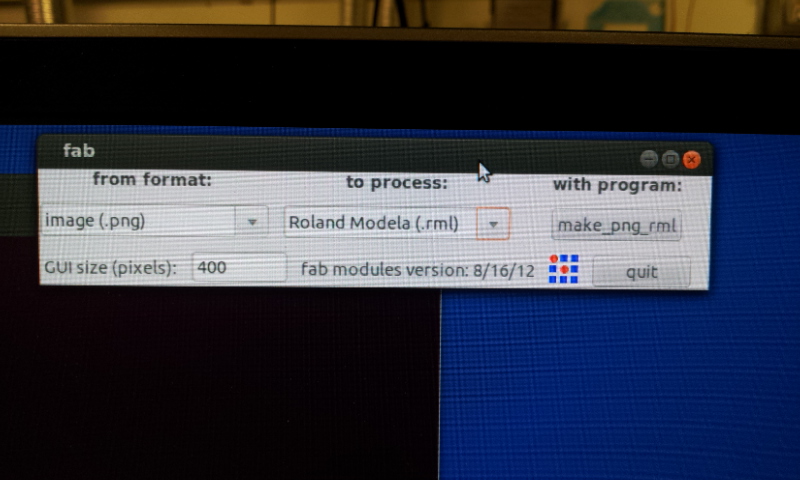
2Open you files in the "fab" module. To open the fab module simply open a terminal
on the computer and type "fab"
|
set format and process
3Import your files. Set the format to png. Set the process to Roland Modela rml.
Load the png
|
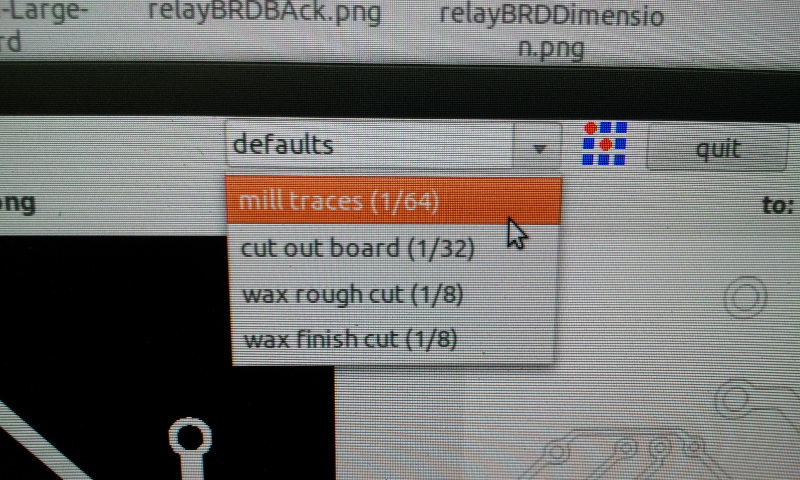
Mill Trace 1/64
4 In the "defaults" pull-down menu, set the material to Mill Trace 1/64
|
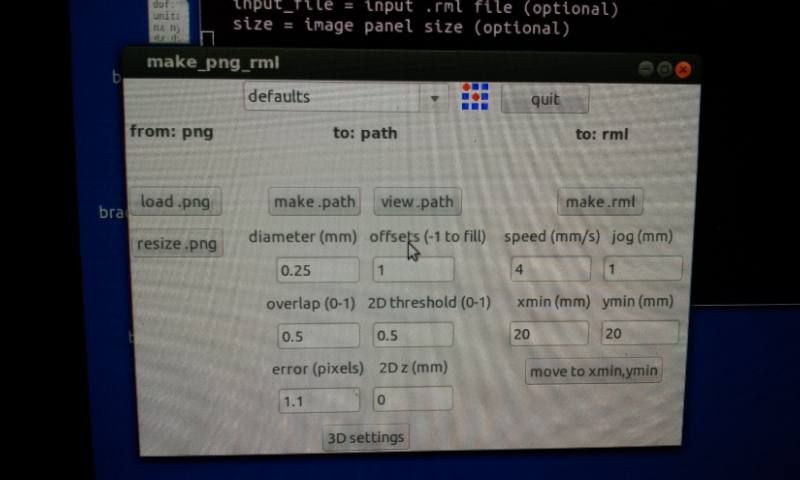
Make Path
5Make Path
|
xmin and ymin
6Move the x and y minimum value to set the starting point of your trace.
Go to the Modela Machine
|
7Push the "view" button on the Modela. this will bring the milling platform close to you.
|
8Put double stick tape on the back of your board, try to cover the whole back
without overlapping the tape.
|
9Making sure you clean the sacrificial board to get rid of old tape. Stick the board down.
|
10Insert the 1/64 bit all the way up in the milling head. If there is a 1/64 bit there
already still make sure to loosen the screws and push the bit all the way up.
|
11Lightly tighten the screws
|
12Press "View" again to get things into postition. The head will go to the (x,y) position
you set on step 6. you will need to re calibrate (x,y) to make sure it aligns with the
lower left corner of your board.
|
13Press and hold the "down" button to bring the bit close to the board.
|
14Stopping far enough from the board, loosen the screws and carefully let the bit out until
it lightly touches the board. Re-tighten the screws. Be careful on this step, if you hit
the tip of the bit it might break.
|
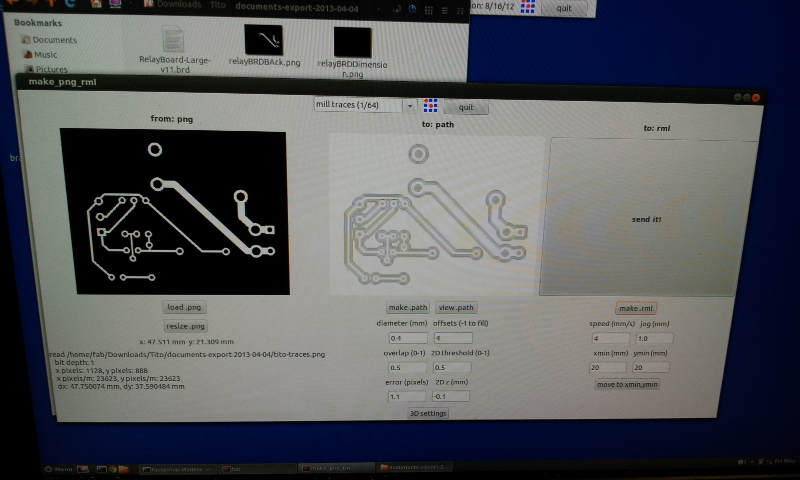
Make RML
15On the Fab Module, click "Make rml" (everytime you move your (x,y) you must re-make the rml)
|
16Click send
|
17Get Soldering
|
